These little gems are practically carb- and calorie-free (with approximately 35 kcal in the whole batch!). They’re airy and feather-light but big on flavor—a dream come true for the holiday season when you crave something small and sweet but don’t want to feel overstuffed.
Tips for making the Sugar-Free Peppermint Meringues
These treats require only a few ingredients so you won’t need to remember long lists of stuff. All you need are egg whites, peppermint-flavored stevia, a little bit of erythritol and a pinch of cream of tartar. (You can read more about my experiments in the next chapter.) In the end, I found that Peppermint Cookie stevia suits this recipe best: it provides both sweetness and a brisk peppermint flavor. I recommend adding a tablespoon or two of powdered erythritol for enhanced sweetness, though.
So! Even though this recipe is very simple, there are a few things to remember to ensure a perfect result. First of all, add the stevia in batches (5 drops at a time) and beat well after each addition. If you add all the sweeteners at once, the foam will most likely collapse into a whitish liquid, which means that your precious ingredients will be wasted (been there, done that…).
And when you bake the meringues, be sure to use a low enough temperature. With a maximum of 200 °F (100 °C) or slightly lower (I use 70-80 °C), they will stay gloriously white and puffy, without acquiring an unpleasant brownish hue.
Making sure that you bake your meringues for long enough at a low temperature guarantees that they’ll be cooked through and dry on the inside, too. In fact, don’t even think of this process as “baking”: you’re actually drying the meringues rather than baking them.
Keep the oven door slightly ajar—for example, with a wooden spoon—to help the meringues dry. If the oven door is closed, there will be too much moisture and the meringues might collapse
If you add crushed peppermint candies on top, be prepared to see the meringues shrink slightly in the oven. This doesn’t affect the texture, though: the meringues should be still deliciously crunchy, and those crushed candies on top really look adorable!
Okay! Let’s take a look at how to prepare these fabulous treats:
Separate two eggs.

Place the whites into a deep and narrow jar. Save the yolks for another purpose (I simply mixed the raw yolks with grated cheese and some spices and ate them like that. A bit hard-core but oh, so nourishing!)
Add a pinch of cream of tartar (to be honest, this isn’t a hard-and-fast rule, but some people do say it makes better meringues. I’m actually not too convinced… so it’s up to you to decide whether you want to add cream of tartar or not.)

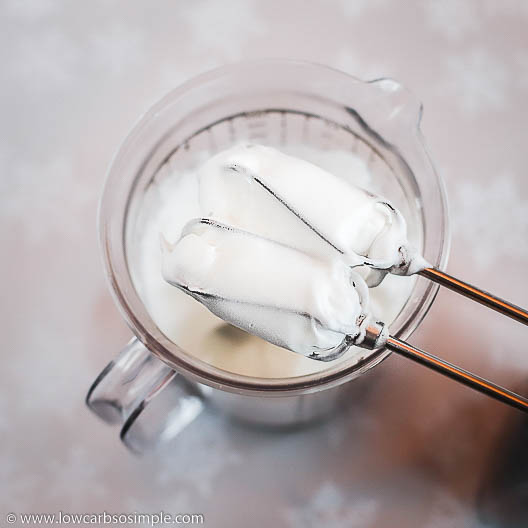
Beat until stiff peaks form.

Take the Peppermint Cookie stevia…

…and add it in three batches (which means 5 drops at a time).

Beat well after each addition.

Finally, add the powdered erythritol.

Beat until well combined. Don’t overbeat! Otherwise the egg whites will lose some of their volume.

Use two spoons to scoop the “batter” into about 12-16 mounds…

…and place them on a baking sheet lined with parchment paper.

Here we go.

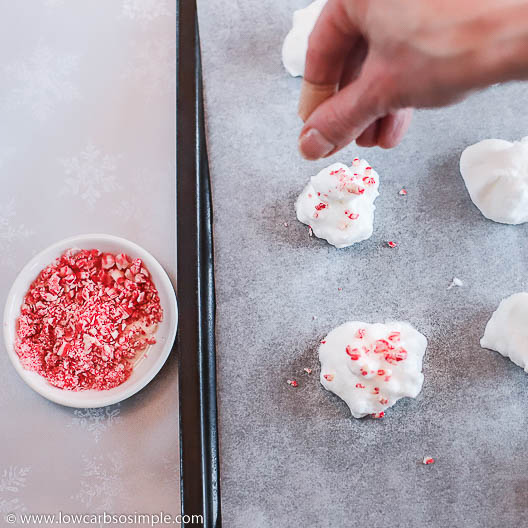
Finally — if desired — sprinkle a little bit of crushed sugar-free peppermint hard candies on top of each meringue.

Looks fab!

Bake at 200 °F (100 °C) or slightly lower for 30 minutes.

Be sure to leave the oven door slightly open while baking (using a wooden spoon, for example).

After 30 minutes, turn off the heat.

Leave the meringues in the oven until completely dry. (I let them stay in the oven overnight.)

Carefully remove the meringues from the parchment paper. Store in a cool, dry place for up to one week.

Yum!

My Sugar-Free Peppermint Meringue experiments
This recipe is actually based on a meringue recipe I developed and posted on Facebook a few years ago. I remember I had some leftover egg whites from some of my recipe experiments and I used them to make meringues.
This year, I thought I wanted to develop a Christmassy recipe with peppermint flavor. I was hovering between Sugar-Free Peppermint Fudge and Sugar-Free Peppermint Meringues.
I was inclined towards meringues in the first place since they are so airy and light — you can actually eat quite a considerable amount of them before you start feeling full, unlike fudge, which is full of fat (not that I have anything against fat, of course! I follow a ketogenic diet so I get most of my energy from fat. Fat is definitely my friend). But since there’s so much heavy food served during the holidays, a lighter dish is always a welcome surprise.
Personally, I often make the mistake of baking the meringues in too hot an oven. This means they will brown on the outside. And nothing looks more miserable than a brown meringue (with the exception of chocolate meringues, of course, which are naturally brown and absolutely delicious)! Lately I’ve finally learned to use a low enough temperature, which means—in my oven—something between 50 °C (122 °F) and 100 °C (212 °F).
I have also learned to keep the oven door slightly ajar while baking: this also reduces the risk of browning the meringues. I would say 90% of the meringues I’ve ever baked have been too brown: that’s the amount of trial and error it took before I learned to bake them at a low enough temperature and to keep the oven door slightly open! And that wasn’t all that long ago…
Plus, I used to be too impatient to keep myself from removing the meringues from the oven before they were fully dried. Nowadays I leave them in the oven overnight. That way they get that crunchy, melt-in-your-mouth texture that proper meringues should have.
For my first peppermint meringue experiment, I decided to use two egg whites, some cream of tartar, a pinch of unrefined sea salt, and 100% peppermint oil to lend a strong peppermint flavor. I sweetened the meringues with 1/4 cup (60 ml) powdered erythritol.
First, I beat the egg whites with the cream of tartar and salt until soft peaks formed. Then I added the powdered erythritol little by little, beating well all the time, until stiff peaks formed. Finally, I added two drops of 100% peppermint oil.
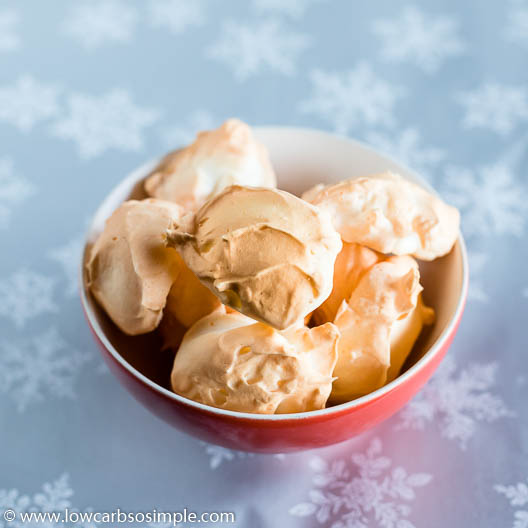
I spooned the meringues onto a baking sheet lined with parchment paper into 16 mounds. I baked them for 30 minutes at 212 °F (100 °C) with the oven door closed. They looked great—except for the fact that they had turned brown! Here’s a photo of them:

After baking, I let them stay in the oven until they were completely dry. I had turned the oven off and placed a wooden spoon between the door and the side of the oven to prop it open.
Once the meringues were completely dry, I tasted one of them. It had far too strong a peppermint flavor for me! The flavor as such was brisk and fresh, but it was just too much. Maybe one drop of peppermint oil would have been enough?
The meringues were also too sweet, so I needed to cut the amount of powdered erythritol drastically.
For my next experiment, I was dying to try out my new discovery: Peppermint Cookie stevia. I had no clue how much to add, so I decided to start with 10 drops. I also added one tablespoon of powdered erythritol, but I thought that wouldn’t be enough, so I added another tablespoon. In the end, I added 5 more drops of Peppermint Cookie stevia to get enough peppermint flavor and also enough sweetness.
This time, I placed a wooden spoon between the oven door and the side of the oven while baking the meringues. But I baked them too long and they turned brown again, as you can see from this photo:

Tastewise, though, I was very surprised at how delicious the meringues turned out with the Peppermint Cookie stevia! The peppermint flavor was more full-bodied and more palatable than in my first experiment, where I had used peppermint oil. This Peppermint Cookie stevia was definitely my new favorite!
However, even though the meringues were really delicious, they tasted a bit too salty for me, so I decided to drop the salt altogether.
For my next experiment, I wanted to add some crushed sugar-free peppermint hard candies sprinkled on top. They would look fabulous and add extra taste and texture, I thought.
But I somehow managed to brown the meringues yet again! Argh!! Check out this photo:

Well, at least the crushed candy looks great on top! And when I sampled a meringue, it tasted totally fab! Next time, I told myself, my meringues will be nice and white, not brown. I was determined.
As I was happy with the recipe ingredients and had a clear plan for how to prepare white meringues instead of brown ones, I started shooting the video for this post.
To make things simpler, I added all the sweeteners (15 drops Peppermint Cookie stevia and 2 tablespoons powdered erythritol) at once to the egg whites, once I had beaten them into soft peaks. That was a huge mistake! When I beat the mixture, the gorgeous, voluminous foam collapsed and I ended up with white fluid. What a shame! I had to throw the precious stuff away. However, lesson learned: the sweeteners should be added gradually (like I had done thus far) in order to avoid upsetting Her Highness (i.e. the delicate voluminous egg whites). I should also beat the egg whites and cream of tartar until stiff peaks form before adding the sweeteners.
Here’s the miserable result, in the form of a screenshot from the failed video:

Well, no reason to complain, really. I shot another video (the one in this post) and this time I got everything right.
In the end I used only one tablespoon powdered erythritol so as not to make the meringues too sweet. Here’s the final recipe: I’m extremely satisfied with it. I bet you’ll love it, too!
Ingredients
- 2 egg whites from organic free-range eggs
- 1/8 teaspoon cream of tartar
- 15 drops Peppermint Cookie stevia
- 1-2 tablespoons powdered erythritol
- (Optional: 1 tablespoon crushed sugar-free peppermint hard candies)
Instructions
- Preheat the oven to 200 °F (100 °C or slightly lower).
- Line a baking sheet with parchment paper.
- Beat the egg whites and the cream of tartar until stiff peaks form.
- Add the Peppermint Cookie stevia 5 drops at a time, beating well after each addition.
- Add the powdered erythritol. Beat until well combined. Do not overbeat.
- Spoon the mixture onto the parchment paper lined baking sheet, into about 12-16 mounds.
- If desired, sprinkle crushed sugar-free peppermint hard candies on top of each meringue.
- Bake for 30 minutes. Keep the oven door ajar while baking by propping it open with a wooden spoon.
- Turn off the oven. Let the meringues dry in the oven for 2-3 hours, or until completely dry.
- Remove from the oven and carefully peel off the parchment paper.
- Store in a cool, dry place for up to 1 week.
| Nutrition Information | In Total | Per serving if 16 servings in total |
| Protein | 8.5 g | 0.5 g |
| Fat | trace | trace |
| Net carbs | 0.3 g | trace |
| kcal | 35 kcal | 2 kcal |
Tips for variation
I really recommend using Peppermint Cookie stevia for these meringues. However, if you can’t get your hands on any, 100% peppermint oil is your next best bet. You can also try peppermint extract or anything pepperminty you happen to have at hand (as long as it doesn’t contain sugar).
I’d love to see what these meringues are like when they’re dipped in melted dark chocolate, but I’m afraid they’ll get soggy and lose their lovely crunchiness. Still, I just might try it. Stay tuned: I’ll let you know what happens.

(Btw. Those Gingerbread Cookies in the photo above are made with this recipe on my other blog.


Hi. This looks delicious! Where do you get the hard sugar free peppermint candies? Thank you!
Thanks! You can get some for example from Amazon